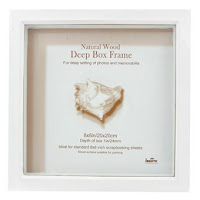
As you may be aware, we run a boarding house. The girls wanted to buy Anna a birthday present and found a lovely site (on something like 'notonthehighstreet') that made customised heart pictures with maps of places that hold special meaning for an individual. There was a frame with three hearts in, and the girls decided that maps of Jersey, Durham (where Anna and I met at uni) and Repton would fit the bill perfectly.
There was only one slight problem with this plan. The site in question charged about 80 kazillion pounds for said piece of work. And the girls didn't have 80 kazillion pounds available. Thus plan B came into action. I popped down to Hobbycraft and bought the following items:
---------------------------------
3 deep picture frames (although I found plain wood ones, rather than white ones)
3 chalkboard hearts (ok, so I actually bought more than 3, in case things went wrong)
I also bought some UHU (I'm sure other glues would have done the trick) and some plain beige-ish card to be the backing material.
I then popped to Millets (which is a camping store) and bought Ordinance Survey maps which included Durham and Repton. In the absence of any Jersey maps, I had to print something off on the computer, which may one day be replaced with a proper map.
As we're in the middle of making a Go-Kart, we had some plywood available. We'll come back to that later...
I also needed some scissors :)
--------------------------------------
And here's the process.
Cut the strings off the chalkboard hearts.
Put one heart on a map, with your desired location roughly central and draw a bit circle round it:
Stick the heart to the back of the map. Personally, I stuck the map to the 'wooden' side. ~You can make sure it's in the right place on the map by holding it up to a window, and ensuring you've got your desired location exactly where you want it before gluing it down. Then cut around the heart, leaving about an inch and a half 'border'.
At this point, you could take the easy way out and trim the map hard up against the heart (possibly with a craft knife), but this means that the map won't wrap around the heart, and I personally didn't think that looked as nice when I tried it. If you're wanting to do it 'properly', then your next job is to feather along the edge, cutting right up to the heart (perpendicular) and making each bit about 2 or 3mm wide. Fold down all the way around, making sure the corners are as 'tight' as possible.
Add glue to the back of the heart all around the edge (it may be worth doing this in two stages, depending on how quickly you can work!).
You need to apply pressure from front to back and hold the strips in place until they stick. This is a bit of a sticky bit, and needs to be done carefully to ensure that the edge looks neat. Because of the curve of the heart, the strips will overlap in some places (and may need extra glue) and will be splayed out in other places.
Give it some time to dry. You'll now need some plywood or equivalent. I cut little triangles of the stuff. You need to stick a triangle to the back of the heart, ideally so it's not really visible once it's put in the frame.
(Yes, I know this picture is of a different map and heart than the others - I forgot what I was doing and stuck the first one onto its backing card before taking the relevant photo).
Once you've done this bit, you're almost there. The final bit is to cut your backing card to size, stick the heart to the middle of it, and frame it.
One reason I chose to do all this in separate frames was that more frames could be added if we ever moved :)
Here's how they look above our dining room doorway:
The girls were very happy with the outcome (and the price!) and Anna was very pleased with her birthday present.


No comments:
Post a Comment